
This article dives into the world of cast iron griddles and how to use them like a professional chef. You’ll find some tips, tricks, and maybe a few mistakes along the way. So, let’s get cooking!
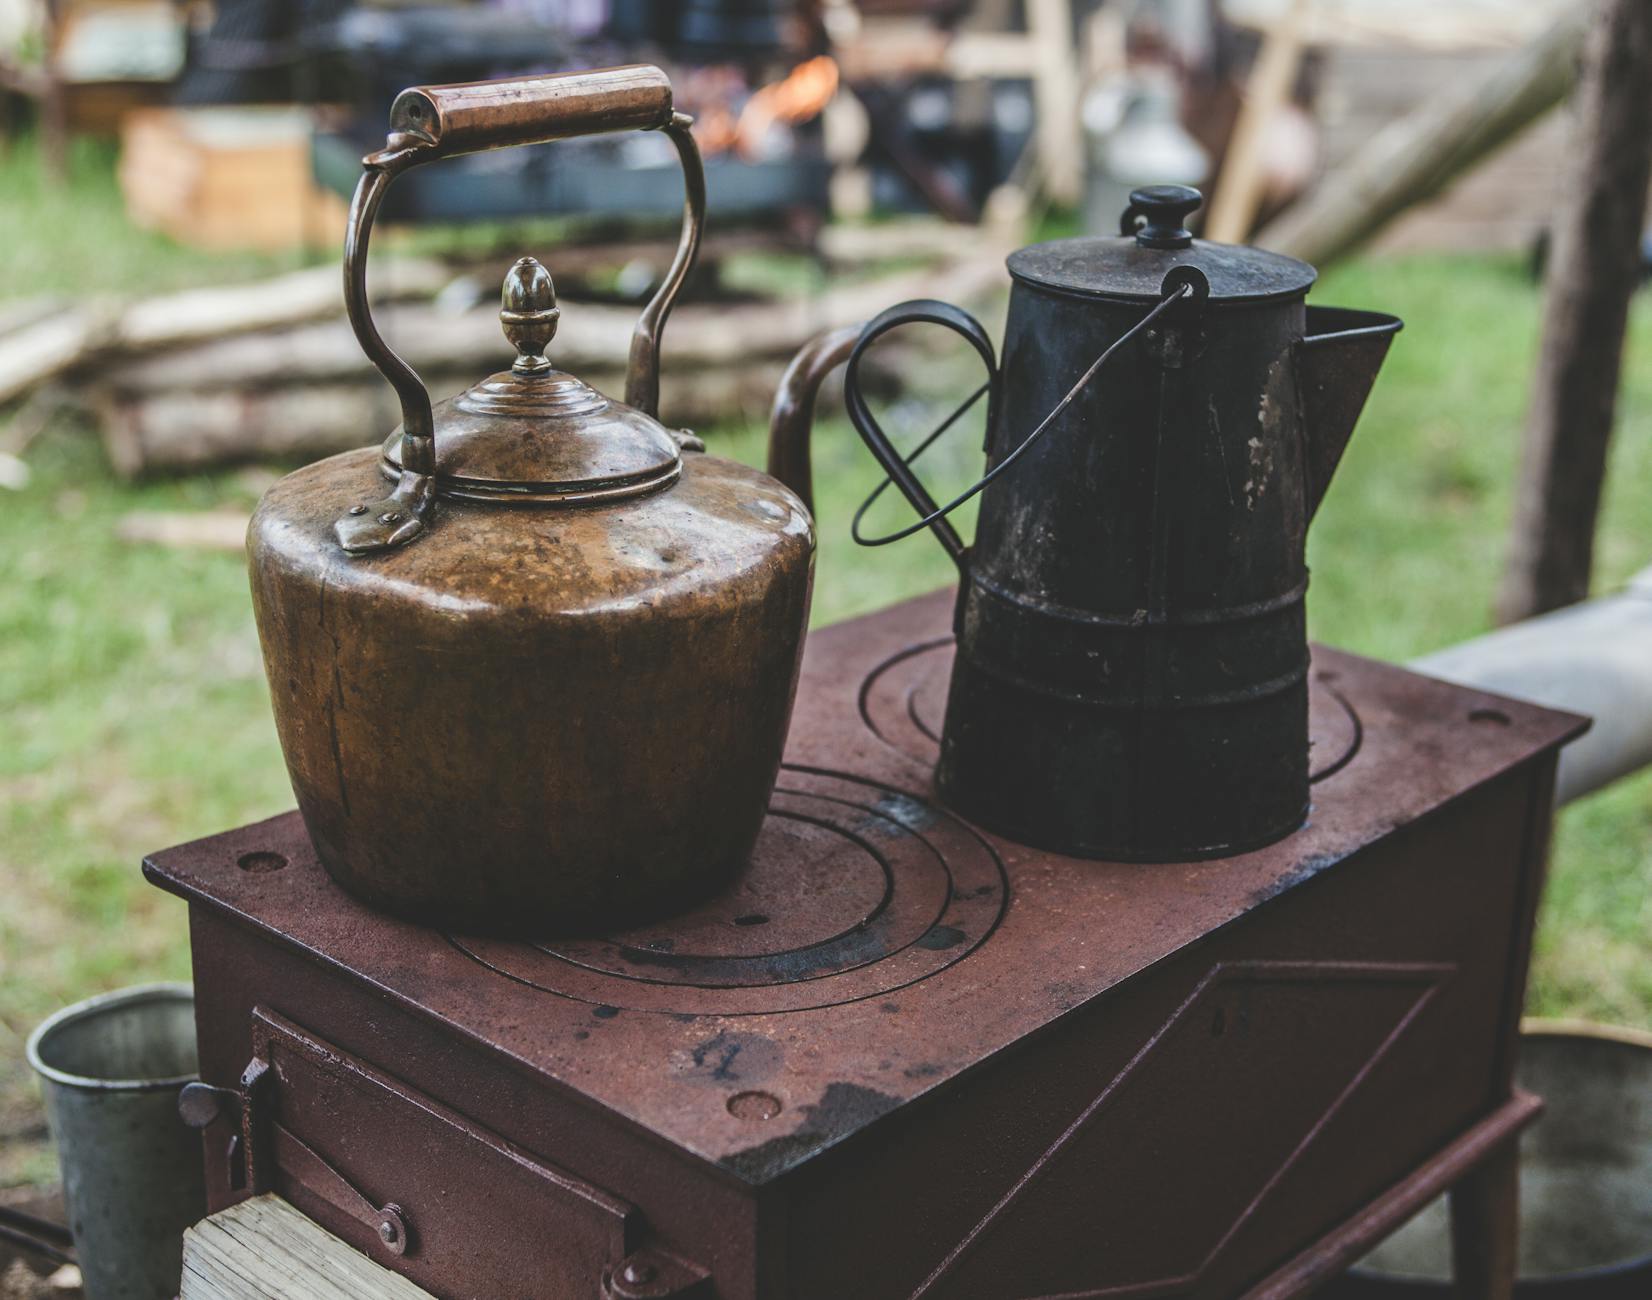
First off, why do people rave about cast iron griddles? Honestly, they are like the rock stars of cookware. They heat evenly, and if you treat them right, they can last a lifetime. Not really sure why this matters, but it just does. They’re versatile too, you can use them on the stovetop or in the oven. Pretty neat, right?
Now, before you can cook like a pro, you gotta know how to prep your griddle. Honestly, it’s not rocket science, but there’s some stuff you should know to avoid disasters. Like, seasoning is like, the most important part of owning a cast iron griddle. It’s basically creating a non-stick surface, and trust me, you don’t wanna skip this step or you’ll regret it.
- Choosing the Right Oil: Not all oils are created equal, folks. Some oils can burn and ruin your seasoning. Maybe it’s just me, but I feel like olive oil is overrated for this. Go for something with a higher smoke point, like grapeseed or canola oil.
- How to Season: To season, just apply a thin layer of oil and bake it upside down in the oven. Sounds easy, huh? But I’ve totally messed it up before, so be careful! If you get it wrong, you might end up with a sticky mess.
Cleaning is a whole thing with cast iron. You can’t just throw it in the dishwasher. You gotta treat it with respect, or it’ll rust faster than you can say “oops.” After cooking, let it cool down a bit, then scrub it with a stiff brush and hot water. No soap, please! Just don’t do it.
Once your griddle is ready, it’s time to learn some cooking techniques. Seriously, there’s a lot you can do with it that will impress your friends or family. Like flipping pancakes? That’s a classic griddle food. But flipping them? That’s an art. You gotta have the right heat and timing, or the kitchen might turn into a disaster zone.
Perfecting the Sear: Searing meat is where the magic happens. You want that crispy outside and juicy inside. But watch out! Too high of a heat and you’ll burn it. Not fun! And, oh boy, if you don’t preheat enough, your food might stick. I mean, who wants to scrape off burnt bits? No thanks!
Even pros make mistakes, so here’s a list of things you might do wrong. Spoiler alert: I’ve done almost all of these:
- Not Preheating Enough: Preheating is key. If you don’t do it, your food might stick. Seriously, it’s a game-changer.
- Using Metal Utensils: Metal utensils can scratch your seasoning. Like, why would you do that? Use wood or silicone instead. It’s not hard, people!
Storing your griddle properly is crucial for its longevity. I’ve seen so many people just toss it in a cabinet. Not the best idea, trust me. Moisture is the enemy! After cleaning, make sure it’s completely dry. I’ve learned that the hard way, and it’s not fun to deal with rust.
Some people swear by using a liner to protect their griddle. It’s a personal choice, but maybe it’s worth considering if you want to keep it in tip-top shape. In conclusion, using a cast iron griddle can elevate your cooking game, but it takes practice. Don’t sweat the small stuff; just enjoy the process and keep experimenting!
Why Cast Iron Griddles Rock
So, cast iron griddles are like, super popular, right? I mean, everyone seems to have one these days. They heat evenly, and can last a lifetime if you treat them right. Not really sure why this matters, but it just does. Like, if you want to cook something that actually tastes good, you’ve gotta have the right tools in your kitchen, and a cast iron griddle is one of those tools.
First off, let’s talk about the heat distribution. You know how some pans just have hot spots? Yeah, not with cast iron. It’s like, they heat up all over, which means your food cooks evenly. That means no more burnt edges and raw centers, which is a total win in my book! Plus, they can go from stovetop to oven. I mean, how many pans can say that? Not many!
Now, let’s not forget about durability. Seriously, these things are built to last. I’ve heard stories of griddles being passed down through generations. It’s like, “Hey, Grandma, what’s your secret?” And she’s like, “Oh, just my trusty griddle from the 1800s.” Okay, maybe not that old, but you get my point. If you take care of it, it can last forever. Just don’t drop it! That would be a disaster.
Here’s a quick comparison table to show why cast iron griddles are the bomb:
| Feature | Cast Iron Griddle | Non-Stick Pan |
|---|---|---|
| Heat Distribution | Even | Uneven |
| Durability | Lifetime | Limited |
| Oven Safe | Yes | No |
| Seasoning Required | Yes | No |
Now, you might be thinking, “Okay, but what about maintenance?” Well, let me tell ya, it’s not as hard as it sounds. Sure, you gotta season it, but that’s just a fancy way of saying you coat it with oil and bake it. Not rocket science, folks! And when it comes to cleaning, you can’t just toss it in the dishwasher. You gotta treat it with respect, or it’ll rust faster than you can say “oops.”
- Tip 1: Always dry it completely after washing.
- Tip 2: Use a light coat of oil after cleaning.
- Tip 3: Avoid using metal utensils to prevent scratches.
But here’s the kicker: even with all these amazing benefits, people still mess it up. Like, not preheating enough? Yeah, that’s a big no-no. If you don’t preheat your griddle, your food is gonna stick like glue. And nobody wants to scrape burnt bits off their precious griddle, right?
Maybe it’s just me, but I feel like using metal utensils is a big mistake too. I mean, why would you want to scratch your seasoning? Just grab a wooden spatula, it’s not hard, people!
In conclusion, cast iron griddles rock for a reason. They’re durable, versatile, and can make your cooking game go from zero to hero. So, if you haven’t jumped on the bandwagon yet, what are you waiting for? Get yourself a cast iron griddle and start cooking like a pro!
Getting Started with Your Griddle
So, before you can whip up some culinary masterpieces on your **cast iron griddle**, you gotta know the ropes. Honestly, it’s not rocket science, but there’s a few things you should be aware of to steer clear of kitchen disasters. First off, let’s talk about prep. You can’t just grab your griddle and expect it to work miracles right outta the box. Nope, you gotta give it some love and attention.
- Understanding Your Griddle: Cast iron griddles are like the old-school rock stars of the cooking world. They’re durable, can handle high heat, and if treated right, they can last for generations. Not really sure why this matters, but maybe it’s because they can make your food taste like it was cooked by a pro.
- Prepping Your Griddle: Before you dive in, make sure to clean it properly. I mean, who wants to cook on a dirty surface? Just wipe it down with a damp cloth and some mild soap. Yes, I said soap. I know, I know, purists are probably cringing, but trust me, you don’t want last week’s leftovers ruining your dinner.
Now, let’s move on to the fun part—seasoning! This is like the holy grail of cast iron care. It’s basically creating a non-stick surface, and you really don’t wanna skip this step or you’ll be regretting it when your pancakes stick like glue.
Choosing the Right Oil: Not all oils are created equal, folks! Some oils can burn and ruin your seasoning. Maybe it’s just me, but I feel like olive oil is overrated for this. Instead, try using flaxseed oil or grapeseed oil. They have higher smoke points, which is super important when you’re heating things up.
Steps to Season Your Griddle:1. Clean the griddle thoroughly.2. Apply a thin layer of your chosen oil.3. Place it upside down in the oven at 450°F (232°C) for about an hour.4. Let it cool down and repeat if necessary.
Cleaning your griddle is another whole thing. You can’t just toss it in the dishwasher like it’s a regular pan. Nope, you gotta treat it with respect. After cooking, just scrape off the food bits while it’s still warm, then rinse with hot water. If you need to use a scrubber, go for a non-metal one. Seriously, metal utensils can scratch your seasoning and that’s just a big no-no.
Now, let’s get to the nitty-gritty of cooking techniques. Once your griddle is prepped and seasoned, it’s time to show off some skills. You can cook everything from breakfast to dinner on this bad boy!
- Flipping Pancakes Like a Boss: Who doesn’t love pancakes? But flipping them? That’s an art form. You gotta have the right heat and timing, or else you’ll end up with a kitchen disaster. Trust me, I’ve been there.
- Perfecting the Sear: Searing meat is where the magic happens. You want that crispy outside and juicy inside. But watch out! Too high of a heat and you’ll burn it to a crisp.
In conclusion, getting started with your **cast iron griddle** is all about prep and practice. Don’t sweat the small stuff; just enjoy the process and keep experimenting. Cooking is supposed to be fun, not a chore!
Seasoning Your Griddle
is like, the most crucial part of owning a cast iron griddle. Seriously, if you skip this step, you might as well be cooking on a rusty old pan. It’s all about creating that perfect non-stick surface, and trust me, you don’t wanna mess it up. I mean, who wants food sticking to their griddle like it’s glued down? Not me, that’s for sure!
So, here’s the deal: when you season your griddle, you’re basically building a protective layer that helps to prevent rust and makes cooking a breeze. But, not all oils are created equal. Some oils can totally ruin your seasoning. Maybe it’s just me, but I feel like olive oil is overrated for this. It burns too easily and can leave your griddle looking like a sad, neglected piece of cookware.
Here’s a quick rundown on how to season your griddle properly:
- Choose the Right Oil: Go for oils with high smoke points like grapeseed or flaxseed oil. They’re like the superheroes of the oil world when it comes to seasoning.
- Clean It First: Make sure your griddle is clean. You don’t wanna season over gunk. That’s just gross.
- Apply a Thin Layer: Use a paper towel to spread a thin layer of the oil all over the surface. Too much oil? Yeah, that’ll just lead to a sticky mess.
- Bake It: Preheat your oven to around 450°F (or 232°C) and place your griddle upside down on the top rack. This helps to evenly distribute the oil. Don’t forget to put a baking sheet on the bottom rack to catch any drips!
- Let It Cool: After an hour, turn off the oven and let the griddle cool down in there. This is like giving your griddle a spa day!
Now, you might be wondering, “How often should I season my griddle?” Well, it kinda depends on how much you use it. If you’re cooking up a storm every day, maybe do it once a month. If it’s more of a special occasion thing, then a couple times a year should be fine. Just keep an eye on it; if it starts looking dull or rusty, it’s time to break out the oil again.
Oh, and don’t forget about cleaning your griddle after cooking! You can’t just throw it in the dishwasher or scrub it with steel wool. That’s like throwing your phone in a pool and expecting it to work perfectly after. Instead, just wipe it down with a cloth or a soft sponge. If there’s stuck-on food, use a bit of hot water and a spatula to gently scrape it off.
Here’s a little table to summarize the key points:
| Step | Details |
|---|---|
| Choose Oil | High smoke point oils like grapeseed or flaxseed. |
| Clean | Ensure the griddle is free from food residue. |
| Apply Oil | Thin layer only, avoid excess. |
| Bake | 450°F for 1 hour, upside down. |
| Cool | Let it cool in the oven. |
In conclusion, seasoning your cast iron griddle is not just a step; it’s like a rite of passage into the world of cooking. Don’t skip it, or you’ll be left with a griddle that’s more trouble than it’s worth. So go ahead, give your griddle the love it deserves, and you’ll be flipping pancakes and searing steaks like a pro in no time!
Choosing the Right Oil
So, let’s chat about oils for a second. Not all oils are created equal, folks. Seriously, some oils can burn and ruin your seasoning, which is like, the last thing you want when you’re trying to cook like a pro on your **cast iron griddle**. Maybe it’s just me, but I feel like olive oil is overrated for this. I mean, sure, it’s fancy and all, but it has a low smoke point, which can totally mess up your griddle. Not really sure why this matters, but it does, trust me!
Now, when it comes to choosing the right oil, you gotta consider a few things. Here’s a quick rundown:
- Smoke Point: This is the temperature at which the oil starts to smoke. You want an oil with a high smoke point for frying and searing.
- Flavor: Some oils can add a flavor punch, while others are pretty neutral. Think about what you’re cooking.
- Health Benefits: Some oils are healthier than others. It’s worth looking into!
Here’s a little table to break it down for ya:
| Oil | Smoke Point (°F) | Flavor Profile | Health Benefits |
|---|---|---|---|
| Canola Oil | 400 | Neutral | High in Omega-3s |
| Avocado Oil | 520 | Buttery | Rich in monounsaturated fats |
| Grapeseed Oil | 420 | Light and nutty | High in Vitamin E |
| Olive Oil | 375 | Fruity and peppery | Good for heart health |
As you can see, oils like **avocado oil** and **grapeseed oil** are your best bets for high-heat cooking. They won’t burn as easily and can help keep that beautiful seasoning intact. But hey, if you’re in the mood for a little flavor, olive oil can still be used, just not for high-heat stuff. Maybe drizzle it on after cooking or something. Just don’t go pouring it all over your griddle before you start cooking!
Also, a little tip from me to you: always store your oils properly. Keep them in a cool, dark place to maintain their quality. Nobody wants rancid oil ruining their cooking experience. It’s like, gross, right?
So, next time you’re about to fire up that **cast iron griddle**, remember to choose your oil wisely. It can make or break your dish, and you definitely don’t want to end up with a burnt mess. Cooking should be fun, not a science experiment gone wrong!
In conclusion, picking the right oil is super important. It’s not just about slapping any old oil on your griddle and calling it a day. You gotta think about smoke points, flavors, and health benefits. So, take your time and choose wisely!
How to Season
So, you just got yourself a shiny new cast iron griddle, huh? That’s awesome! But before you jump into the cooking action, you gotta season it first. I mean, it’s like the rite of passage for cast iron cookware, right? Not really sure why this matters, but it’s super important if you want that non-stick surface that makes cooking a breeze.
Now, here’s the deal: seasoning is basically creating a protective layer on your griddle. You don’t wanna skip this step, trust me, or you’ll end up with a griddle that sticks worse than your ex. So, let’s break it down into some easy-peasy steps.
- Step 1: Gather Your Supplies
- A good quality oil (more on that later)
- Paper towels or a clean cloth
- Oven
- Aluminum foil (to catch drips)
- Step 2: Clean Your Griddle
First things first, give your griddle a good wash. Use hot water and a stiff brush. No soap! Seriously, soap is like the enemy here. Just rinse it and dry it well.
- Step 3: Apply the Oil
Now, this part is crucial. You wanna apply a thin layer of oil all over the griddle. Like, really thin. If you slather it on like you’re frosting a cake, you’re gonna have a sticky mess. And, let’s be real, nobody wants that.
- Step 4: Bake It
Here’s where the magic happens. Preheat your oven to about 450°F (232°C). Place your griddle upside down on the middle rack. Don’t forget to put some aluminum foil on the bottom rack to catch any drips. You want that oil to bake into the surface, creating that beautiful non-stick layer.
- Step 5: Cool Down
After an hour, turn off the oven and let the griddle cool down in there. This is important because it helps set the seasoning. If you pull it out too soon, you might mess it up. And trust me, I’ve totally messed it up before, so be careful!
Now, let’s talk about oil. Not all oils are created equal, folks. You might think olive oil is the way to go, but maybe it’s just me, but I feel like it can burn too easily. Instead, try using oils with a higher smoke point like canola or grapeseed oil. They’re just better suited for this kind of thing.
Also, don’t forget to season your griddle regularly! I mean, it’s not like you have to do it every week, but every few months wouldn’t hurt. Just keep an eye on it. If food starts to stick, that’s your sign that it’s time for a little TLC.
| Common Oils for Seasoning | Smoke Point (°F) |
|---|---|
| Canola Oil | 400 |
| Grapeseed Oil | 420 |
| Flaxseed Oil | 225 |
In conclusion, seasoning your cast iron griddle may seem like a chore, but it’s totally worth it. Just follow these steps, and you’ll have a griddle that lasts a lifetime. So go ahead, get your cook on, and enjoy the deliciousness that follows!
Cleaning Your Griddle
So, let’s talk about cleaning your cast iron griddle. It’s like this whole ritual that you gotta do if you wanna keep your griddle in good shape. I mean, you can’t just toss it in the dishwasher and call it a day, right? Nope! That would be like throwing your grandma’s china in the trash. You gotta treat it with respect, or it’ll rust faster than you can say “oops.”
First off, you gotta understand that cast iron griddles are not your average cookware. They need love and care, just like a pet. And if you neglect them, well, good luck with that rust. It’s not pretty, trust me. So, what do you do? Here’s a quick rundown:
- Let it cool down: After cooking, don’t be a hero and try to clean it while it’s still hot. That’s just a recipe for burns. Let it cool a bit.
- Scrape off the food bits: Use a spatula or a scraper to get off any stuck-on food. It’s like a mini workout, but worth it.
- Rinse with water: Now, here’s where it gets tricky. You can rinse it with water, but don’t soak it! Water and cast iron are like oil and water. They don’t mix well.
Now, let’s dive into the real deal: cleaning techniques. You might be wondering, “How do I avoid ruining my seasoning?” Well, here’s the scoop. You can use a little bit of soap, but not too much! Some people say soap is a no-go, but maybe it’s just me, I feel like a tiny bit won’t hurt. Just don’t go overboard.
After you’ve scrubbed it down, it’s time to dry it off. Like, really dry it off. Moisture is the enemy! I can’t stress this enough. If you leave water on it, you’re basically inviting rust to your party. And trust me, rust is not the guest you want showing up uninvited.
Once it’s dry, you should apply a thin layer of oil. This is like giving your griddle a nice little spa treatment. Use a paper towel to spread it around, and make sure it’s even. You don’t wanna have some parts all oily and others dry. That’s just weird.
Here’s a quick table to summarize the do’s and don’ts of cleaning your griddle:
| Do’s | Don’ts |
|---|---|
| Let it cool before cleaning | Soak it in water |
| Use a scraper for stuck food | Use metal scrubbers |
| Dry it thoroughly | Leave it wet |
| Apply a thin layer of oil | Skip the oiling step |
And there you have it! Cleaning your griddle is not rocket science, but it does require some attention. If you follow these tips, you’ll be well on your way to keeping your cast iron griddle in tip-top shape. Just remember, it’s all about the love and care you give it. So don’t be lazy, and treat your griddle right!
In conclusion, you might mess up a few times, and that’s okay. We all learn from our mistakes, right? Just embrace the chaos and enjoy the journey of cooking with your griddle. Happy cooking!
Cooking Techniques to Master
Once your griddle is ready, it’s time to dive into some cooking techniques that will totally impress your friends or family. Seriously, there’s a lot you can do with it! You might be thinking, “What’s the big deal?” Well, let me tell you, mastering these techniques can turn you into a kitchen superstar, or at least make you look like one. So, grab your apron and let’s get cooking!
- Flipping Pancakes Like a Boss
Pancakes are like the classic griddle food, right? But flipping them? That’s an art form! You gotta get the heat just right, or you’ll end up with a pancake that’s more like a frisbee. Not really sure why this matters, but if you want fluffy pancakes, you gotta let them bubble before you flip. Here’s a quick tip: use a spatula that’s wide enough to support the pancake. Trust me, you don’t wanna be fishing a broken pancake off the griddle.
- Perfecting the Sear
Searing meat is where the magic happens, folks. You want that crispy outside and juicy inside. But watch out! Too high of a heat and you’ll burn it faster than you can say “oops.” So, what’s the secret? Well, it’s all about patience. Let the meat sit on the griddle without poking it. Seriously, don’t poke it! It’s like a bad relationship; sometimes you just gotta let it be.
- Stir-Frying with Style
Okay, stir-frying on a griddle is a game-changer. You can toss in all your favorite veggies and proteins, and it’s like a flavor party! But here’s the catch: you gotta keep everything moving. If you let it sit, you’ll end up with a soggy mess. And who wants that? Not me! So, get your spatula dancing and make sure everything is coated in that deliciousness.
| Technique | Key Tip |
|---|---|
| Flipping Pancakes | Wait for bubbles before flipping! |
| Searing Meat | Don’t poke it; let it sit! |
| Stir-Frying | Keep it moving! |
And let’s not forget about grilled sandwiches. Oh man, if you haven’t made a grilled cheese on a griddle, you’re missing out! The key is to use low heat and let it slowly melt. If you crank it up too high, you’ll end up with burnt bread and cold cheese. Not cool, right? So, take your time and enjoy the process.
Now, I know what you’re thinking: “This sounds great, but what if I mess it up?” Well, guess what? Everyone messes up! I’ve burned more pancakes than I can count, and my first grilled cheese looked like a science experiment gone wrong. But that’s part of the fun! Cooking is all about experimenting and learning from your mistakes.
In conclusion, mastering these cooking techniques on your griddle can elevate your culinary game. Just remember to have fun, embrace the chaos, and don’t sweat the small stuff. So go ahead, get that griddle sizzling, and impress your friends and family with your newfound skills!
Flipping Pancakes Like a Boss
Pancakes are like, the ultimate breakfast food, right? But flipping them? That’s an art form all on its own. You gotta have the right heat and timing, or trust me, your kitchen might turn into a disaster zone faster than you can say “breakfast is served!”
First things first, let’s talk about the **perfect pancake batter**. It’s not rocket science, but it’s also not just throwing flour and water together. You need to mix your ingredients just right. Too much mixing? You’ll end up with tough pancakes. Not enough? Well, then you’ll have lumps. So, a little bit of finesse goes a long way here. Maybe it’s just me, but I feel like the secret ingredient is a pinch of love. Or maybe it’s just sugar? Who knows!
- Ingredients List:
- 1 cup all-purpose flour
- 2 tablespoons sugar
- 1 tablespoon baking powder
- 1/2 teaspoon salt
- 1 cup milk
- 1 egg
- 2 tablespoons melted butter
Now, once you’ve got your batter ready, it’s all about the **heat control**. You want to preheat your griddle to medium heat, but not too hot! If it’s too hot, your pancakes will burn on the outside and be raw in the center. And nobody wants that. I mean, just imagine serving a pancake that’s basically a charcoal briquette on one side and gooey batter on the other. Yikes! So, patience is key here, folks.
When it’s time to pour the batter onto the griddle, make sure you don’t go too big. A 1/4 cup of batter is usually just right. But again, maybe it’s just me, but I tend to get a bit too ambitious and end up with giant pancakes that look more like a pizza than breakfast. Whoops!
Here comes the fun part: flipping! You gotta wait until you see those little bubbles forming on the surface of the pancake. That’s your cue! But here’s a tip: don’t rush it! If you flip too soon, you’ll have a sad, half-cooked pancake. And let’s be real, no one wants to eat a pancake that looks like a failed science experiment.
Step-by-Step Flipping Guide: 1. Wait for bubbles to form. 2. Slide your spatula under the pancake gently. 3. Flip it swiftly but carefully. 4. Cook for another minute until golden brown.
And if you’re feeling fancy, you can add things like chocolate chips or blueberries to the batter. But let’s just say, if you’re using blueberries, make sure they don’t explode everywhere when you flip. Otherwise, it’s a real mess!
In conclusion, flipping pancakes like a boss is all about practice and a little bit of luck. Don’t stress too much if you mess up. I mean, it’s just pancakes, right? Just keep trying, and soon enough, you’ll be flipping those bad boys like a pro. And remember: even if they don’t look perfect, they’ll still taste amazing. And that’s what really matters!
Perfecting the Sear
Searing meat is like, where the real magic happens in the kitchen. You know, it’s that moment when you get that crispy outside and juicy inside that makes your taste buds do a little dance. But, hold your horses! If you crank the heat up too high, you’re gonna end up with a charred mess that even your dog wouldn’t want to eat. Seriously, it’s a fine line between perfection and disaster.
First things first, let’s talk about the right temperature. Some folks say you need to get your griddle to a smoking point, but honestly, that’s a bit of a gamble. You might wanna aim for medium-high heat. This way, you can achieve that coveted sear without turning your steak into a piece of charcoal. You want to hear that sizzle when the meat hits the griddle; it’s like music to a cook’s ears!
- Tip #1: Always pat your meat dry with a paper towel before searing. Moisture is the enemy of a good sear!
- Tip #2: Don’t overcrowd the pan. Give each piece of meat its space to breathe, or you’ll end up steaming instead of searing.
- Tip #3: Let it be! Once you place the meat on the griddle, resist the urge to poke and prod it. Let it sit and develop that nice crust.
Now, let’s get into the meat of the matter (pun intended). The type of meat you choose can also make a big difference. A good cut like ribeye or sirloin is ideal for searing because of its fat content. Fat equals flavor, folks! So, maybe it’s just me, but I feel like using lean cuts is a bit of a mistake if you want that rich, savory taste.
Here’s a little table to help you out with some common meats and their ideal cooking times:
| Type of Meat | Thickness | Cooking Time (per side) |
|---|---|---|
| Steak (Ribeye) | 1 inch | 4-5 minutes |
| Pork Chops | 1 inch | 5-6 minutes |
| Chicken Breast | 1 inch | 6-7 minutes |
Also, seasoning is crucial! A simple mix of salt and pepper can do wonders. Not really sure why some people overcomplicate things with fancy marinades. Keep it simple, and let the meat shine! But, if you’re feeling adventurous, you can always throw in some garlic powder or smoked paprika for an extra kick.
And here’s where it gets a bit tricky. Timing is everything. You gotta know when to flip your meat. If you flip too soon, you won’t get that beautiful crust. But if you wait too long, well, you might just ruin dinner. So, keep an eye on it!
In conclusion, perfecting the sear is all about patience, practice, and a little bit of finesse. It’s not rocket science, but it does require some attention to detail. So, next time you fire up your cast iron griddle, remember these tips and you’ll be well on your way to impressing your friends and family with your culinary skills. Happy cooking!
Common Mistakes to Avoid
So, you’ve got your shiny new cast iron griddle, and you’re ready to impress everyone with your culinary skills. But hold your horses! Even the most seasoned (pun intended) chefs make mistakes. Here’s a rundown of common blunders you might want to avoid. Spoiler alert: I’ve totally done almost all of these, and let me tell you, it’s not pretty!
- Not Preheating Enough: This is like, a rookie mistake. Preheating your griddle is super important. If you don’t do it, your food might stick like glue. Who wants to scrape off burnt bits? Not me! Seriously, just give it a few minutes to heat up. You’ll thank me later.
- Using Metal Utensils: Okay, this one is a biggie. Using metal utensils on your griddle can scratch the seasoning. Like, why would you do that? It’s like throwing a rock at a glass house. Just use wood or silicone, people! It’s not rocket science.
- Skipping the Seasoning: If you think you can skip seasoning your griddle, think again! This is the most crucial step. It’s like putting on sunscreen before hitting the beach. Trust me, you don’t wanna end up with a rusty griddle. I’ve been there, and it’s not fun.
- Overcrowding the Griddle: So, you’re making pancakes, and you think, “Hey, I can fit a ton on here!” Wrong! Overcrowding your griddle can lead to uneven cooking. It’s like trying to fit ten people in a tiny car. Just don’t do it!
- Ignoring the Heat Level: Different foods require different heat levels. If you’re searing meat, you need high heat, but for eggs? Not so much. Maybe it’s just me, but I feel like people don’t pay enough attention to this. Too high heat can lead to burnt food, and nobody wants that!
Here’s a nifty little table summarizing these mistakes:
| Mistake | Why It’s Bad | How to Avoid |
|---|---|---|
| Not Preheating Enough | Food sticks and burns. | Give it time to heat up. |
| Using Metal Utensils | Scratches seasoning. | Use wood or silicone utensils. |
| Skipping the Seasoning | Rust and sticking. | Always season your griddle! |
| Overcrowding the Griddle | Uneven cooking. | Cook in batches. |
| Ignoring the Heat Level | Burnt or undercooked food. | Adjust heat according to food. |
So, there you have it! A list of common mistakes that even the pros make. Just remember, cooking is all about experimenting and learning from your blunders. It’s totally okay to mess up; that’s how you grow as a cook. And who knows? Maybe one day you’ll be the one giving tips to newbies!
Not Preheating Enough
is like, a huge mistake that many people make when using a cast iron griddle. Seriously, if you skip this step, you might as well just throw your food in the trash, because it’s gonna stick like glue! I mean, who wants to spend their time scraping off burnt bits? Not me, that’s for sure!
So, what’s the deal with preheating? Well, it’s all about getting that griddle nice and hot before you start cooking. You wanna create that perfect cooking surface that helps your food slide right off. But here’s the kicker: if you don’t preheat it enough, you might end up with some seriously sad, stuck-on pancakes or burgers that look more like a science experiment gone wrong than a delicious meal.
- Why Preheating Matters: When you preheat your griddle, you’re allowing the heat to distribute evenly. This means that your food cooks uniformly, which is kinda important, right? If one part of your griddle is hot and the other is cold, you’re gonna have a problem.
- How Long to Preheat: Not really sure why this matters, but a good rule of thumb is to let it heat up for about 10-15 minutes. You can test if it’s ready by flicking a few drops of water on it. If they sizzle and evaporate almost immediately, you’re golden!
Now, I get it, waiting can be a drag. Maybe it’s just me, but I feel like I’m wasting precious time when I could be flipping pancakes or grilling a juicy steak. But trust me, it’s worth it. Think of it as a warm-up for your griddle, kinda like how athletes stretch before a game. You wouldn’t want to jump into a marathon without warming up, right?
| Food Item | Recommended Preheat Time |
|---|---|
| Pancakes | 10 minutes |
| Steaks | 15 minutes |
| Vegetables | 10 minutes |
Another thing to keep in mind is that not all griddles are created equal. Some might heat up faster than others, so you gotta pay attention to how yours performs. Maybe you’ve got a vintage one that takes its sweet time, or a newer model that heats up like a champ. Either way, don’t just assume it’s ready to go after a couple of minutes.
And let’s talk about that moment of truth when you finally put your food on the griddle. If you hear that satisfying sizzle, you’re on the right track! But if it’s more of a sad, quiet sound, then you might wanna wait a bit longer. No one wants to eat sad food, am I right?
In conclusion, preheating is a simple step that can make or break your cooking experience on a cast iron griddle. So, don’t skip it! Take the time to get it hot and ready, and you’ll be rewarded with perfectly cooked meals that’ll impress your friends and family. Happy cooking!
Using Metal Utensils
So, let’s talk about something that’s, like, super important when using your cast iron griddle: the utensils you use. Now, I know what you might be thinking, “What’s the big deal?” Well, let me tell you, it’s a big deal! Using metal utensils can scratch your seasoning, and trust me, you don’t wanna mess that up. Like, why would you even do that? It’s just common sense, right?
First off, let’s get into why your seasoning is so precious. It’s basically the protective layer that makes your griddle non-stick. If you scratch it, you’re gonna have a bad time. You might as well be cooking on a rusty old pan! So, what should you use instead? Well, wood or silicone utensils are your best friends here. They won’t ruin your seasoning, and they’re not hard to find. Seriously, people, it’s not rocket science!
| Type of Utensil | Pros | Cons |
|---|---|---|
| Wooden Utensils | Gentle on seasoning | Can wear out over time |
| Silicone Utensils | Heat resistant, non-stick | Can be pricey |
| Metal Utensils | Durable, good for tough food | Scratches seasoning, not recommended |
Now, I get it. You might be thinking, “But I love my metal spatula!” Maybe it’s just me, but I feel like there’s a time and a place for everything. And when it comes to your cast iron griddle, metal is not the way to go. You’ll end up regretting it, and then you’ll be stuck scrubbing away at the mess you made. Not fun!
- Tip #1: Always keep wooden or silicone utensils handy.
- Tip #2: If you must use metal, do it sparingly and with caution.
- Tip #3: Consider investing in a good set of non-scratch utensils.
Okay, so let’s be real for a second. Sometimes, you just forget what you’re using, and that’s okay. We’re all human, right? But if you want to keep your griddle in tip-top shape, you gotta pay attention. It’s like, not really sure why this matters, but it does! Your future self will thank you for it, I promise.
In conclusion, using the right utensils is crucial for maintaining your cast iron griddle. Metal utensils can scratch your seasoning, and that’s just a no-go. So, do yourself a favor and stick to wood or silicone. It’s not hard, people! Just think about the delicious meals you can make without the worry of ruining your griddle. Happy cooking!
Storing Your Griddle
properly is crucial for its longevity. I’ve seen so many people just toss it in a cabinet. Not the best idea, trust me. If you want your **cast iron griddle** to last and serve you well, you gotta take some extra steps. Here’s the lowdown on how to do it right.
- Keep it Dry: Moisture is like the enemy of cast iron. After you clean your griddle, make sure it’s completely dry. I mean, who wants to deal with rust? I’ve learned that the hard way, and it’s not fun. Seriously, it’s like watching your beloved griddle slowly die.
- Use a Liner: Some folks swear by using a liner, like a cloth or parchment paper, to protect their griddle. Maybe it’s just me, but I feel like it’s worth considering if you want to keep it in tip-top shape. It’s like putting a blanket on your favorite couch, right?
Now, let’s talk about storing techniques. You can’t just shove it anywhere and hope for the best. Here’s a little table of dos and don’ts:
| Dos | Don’ts |
|---|---|
| Wrap it lightly in a clean cloth. | Store it in a damp area. |
| Keep it in a cool, dry place. | Stack heavy items on top of it. |
| Check it regularly for signs of rust. | Forget about it for months on end. |
So, after cleaning and drying, what’s next? I’ve seen people just toss it in a cabinet like it’s some cheap pan. Not cool! You gotta treat it with respect. Think of it like a pet; it needs care and attention. Maybe it’s just me, but I feel like a little extra love goes a long way.
Another thing to consider is the temperature changes. If you’re storing it somewhere that gets super hot or cold, you might wanna rethink that. Cast iron can expand and contract, leading to cracks or warping. Not really sure why this matters, but it does! So, keep it in a stable environment.
Also, if you have a lot of griddles or pans, stacking them can be a real pain. You don’t wanna scratch the seasoning. I mean, who wants to ruin all that hard work? Use some kind of protective layer between them. Maybe a paper towel or something? Just a thought!
And let’s not forget about the long-term storage. If you’re not planning to use your griddle for a while, consider applying a thin layer of oil to protect it from moisture. It’s like giving it a spa day! Just make sure to wipe off any excess oil before you use it again. Otherwise, you might end up with a greasy pancake disaster. Yikes!
In conclusion, storing your **cast iron griddle** properly is just as important as cooking on it. Treat it right, and it’ll serve you well for years to come. So, take a few extra minutes to store it properly. You’ll thank yourself later when you’re flipping pancakes like a pro!
Keeping it Dry
So, let’s talk about something super important when it comes to your cast iron griddle: keeping it dry. Moisture is like, the enemy! Seriously, it’s not just a catchy phrase; it’s a fact. After you clean your griddle, you gotta make sure it’s completely dry. I’ve learned that the hard way, and trust me, it’s not fun to deal with rust. Like, who wants to scrub away at a rusty griddle? Not me!
First off, let’s break down why moisture is such a big deal. Cast iron is porous, which means it can soak up water like a sponge. If you leave it wet, you’re basically inviting rust to the party. And rust is that uninvited guest that just won’t leave. It’s annoying, and it can ruin your griddle. So, how do you keep it dry?
- Wipe it Down: After washing, grab a clean cloth or paper towel and wipe down your griddle. Make sure you get into all those little nooks and crannies. You don’t wanna miss a spot!
- Heat it Up: Once you’ve wiped it, put your griddle on low heat for a few minutes. This helps evaporate any leftover moisture. It’s like giving your griddle a little spa day!
- Cool It Off: After heating, let it cool completely before storing. This way, it won’t trap any moisture as it cools down. Think of it like letting your pizza cool before you slice it. Nobody likes a soggy slice!
Now, I know what you’re thinking: “Is it really that serious?” Well, maybe it’s just me, but I feel like a lot of people overlook this step. They think they can just wash it and toss it in the cabinet. But trust me, that’s a recipe for disaster. I’ve been there, done that, and I can tell you it’s not worth it. You’ll end up with a griddle that’s more rust than iron, and that’s just sad.
Here’s a little table to sum up the steps:
| Step | Action |
|---|---|
| 1 | Wipe it down with a cloth |
| 2 | Heat it on low for a few minutes |
| 3 | Let it cool completely before storage |
Also, if you’re like me and tend to forget things (hello, busy life!), consider setting a reminder on your phone. Just a little nudge to remind you to check on your griddle after cleaning. It’s the little things, right?
Lastly, I gotta mention that some people use a liner or a cloth to cover their griddle while it’s stored. It’s a personal choice, but maybe it’s worth considering if you want to keep it in tip-top shape. Again, not really sure why this matters, but it could save you some hassle in the long run.
In conclusion, keeping your cast iron griddle dry is crucial for its longevity. It’s a simple step that can save you from a lot of headaches down the road. So, embrace the process, and don’t let moisture ruin your griddle game!
Using a Liner
So, let’s talk about for your cast iron griddle. I mean, some people swear by it, and honestly, I’m not really sure why this matters, but maybe it’s worth considering if you want to keep your griddle in tip-top shape. Like, who wouldn’t want that, right? But, is it really necessary? Let’s dive into this whole liner thing and see what the fuss is about.
First off, a liner can help protect your griddle from scratches and stains. You know, those little marks that make your griddle look all sad and neglected? No one wants that. It’s like putting a cover on your couch to keep it clean. But then again, do you really need to go that far? Maybe it’s just me, but I feel like some people take it a bit too seriously. I mean, it’s just a griddle, not a family heirloom!
Now, let’s talk about the types of liners you might consider. There’s a bunch of options out there, and not all of them are created equal. Here’s a quick rundown:
| Type of Liner | Pros | Cons |
|---|---|---|
| Silicone Liners | Non-stick, easy to clean | Can be pricey |
| Parchment Paper | Disposable, good for one-time use | Not reusable, can burn at high temps |
| Aluminum Foil | Inexpensive, versatile | Not eco-friendly, can tear easily |
Okay, so after looking at these options, it’s clear that each has its own ups and downs. But, let’s be real here, are you really gonna use a liner every single time you cook? Maybe you will, maybe you won’t. It’s totally a personal choice. Some folks are all about that liner life, while others are like, “Nah, I’m good.”
Another thing to think about is how a liner can affect the cooking process. I’ve heard some people say that it can mess with heat distribution. Like, if you’re trying to sear a steak, you don’t want any barriers between the griddle and your meat. But is that really a big deal? I mean, I’ve cooked on my griddle without a liner a million times and it turned out fine. Just saying!
And then there’s the cleaning aspect. A liner can make clean-up a breeze. You just toss it out, and boom! No scrubbing required. But, on the flip side, if you’re using a liner, are you really getting that authentic cast iron experience? Some might argue that you’re missing out on that lovely seasoning that comes from direct contact with the griddle. It’s like, do you want convenience or authenticity? Tough call!
In conclusion, using a liner is totally up to you. There’s no right or wrong answer here. If you think it’ll help keep your griddle looking fresh and clean, go for it! But if you’re more of a “let’s get down and dirty” kind of cook, then skip the liner and embrace the griddle life. Just remember, at the end of the day, it’s all about what works best for you. Happy griddling!
Conclusion: Cook Like a Pro!
In wrapping up, I gotta say that using a cast iron griddle is like unlocking a new level in your cooking game. It’s not just about slapping some food on a hot surface; it’s about the journey, you know? Sure, it takes a bit of practice to get the hang of it, but honestly, that’s where the fun is. I mean, who wants everything to be perfect all the time? Not me!
Don’t sweat the small stuff; just enjoy the process and keep experimenting. You might burn a pancake or two, and that’s totally okay! It’s all part of the learning curve. I remember the first time I tried to cook on my griddle, I thought I was a total pro until I realized I had the heat way too high. Spoiler alert: burnt food is not the goal here.
- Tip 1: Embrace the mess! Cooking is not a clean sport.
- Tip 2: Don’t be afraid to try new recipes. Some might flop, but hey, that’s how you find the gems.
- Tip 3: Always have a backup plan. Like, if your griddle meal goes south, maybe order pizza instead?
And let’s be real, it’s not just about the food. It’s about the stories you create while cooking. I’ve had some hilarious moments in the kitchen, like when my friend thought it was a good idea to flip a burger with a spatula and ended up launching it across the room. Good times!
Now, about the cast iron griddle itself, it’s practically a culinary superhero. It retains heat like nobody’s business, which is why you can achieve that perfect sear on your steak or that golden-brown crust on your pancakes. But, and this is a big but, if you don’t take care of it, it could turn into a rusty nightmare. Seriously, moisture is the enemy! I learned that the hard way, and trust me, it’s not a fun experience.
| Mistakes to Avoid | Consequences |
|---|---|
| Not Preheating | Food sticks and burns. Yikes! |
| Using Metal Utensils | Scratched seasoning, which leads to sticking. Double yikes! |
| Skipping Seasoning | No non-stick surface, just a mess. |
So, when it comes to cleaning your griddle, don’t just toss it in the dishwasher. That’s like throwing your favorite shirt in the washer with a bunch of rocks. Treat it with care! A little warm water and a scrub brush will do wonders. Just make sure it’s dry afterwards, or you’ll be dealing with rust, and nobody wants that drama.
All in all, cooking with a cast iron griddle is an adventure. You might mess up, but that’s all part of the gig. It’s about enjoying the food, the friends, and the occasional kitchen disaster. So go ahead, get that griddle sizzling, and remember: perfection is overrated. Just have fun with it!
Frequently Asked Questions
- How do I properly season my cast iron griddle?
To season your cast iron griddle, apply a thin layer of oil (like flaxseed or grapeseed oil) over the surface. Then, place it upside down in the oven at a high temperature (around 450°F) for about an hour. This process creates a non-stick coating, so don’t skip it!
- Can I use soap to clean my cast iron griddle?
While you can use a small amount of mild soap, it’s generally best to avoid it. Instead, use hot water and a stiff brush or sponge to clean your griddle. Remember to dry it thoroughly afterward to prevent rust!
- What types of oil are best for seasoning?
Not all oils are created equal! Oils with high smoke points, like flaxseed, grapeseed, or canola oil, are excellent choices for seasoning your griddle. Olive oil, while popular, can burn and ruin your seasoning.
- How can I prevent my food from sticking?
Preheating your griddle properly is crucial to prevent sticking. Make sure to heat it for at least 10-15 minutes before cooking. Also, using enough oil or fat when cooking can help keep your food from sticking!
- What’s the best way to store my cast iron griddle?
To store your griddle, keep it in a dry place and consider placing a paper towel inside to absorb any moisture. This helps prevent rust and keeps your griddle in great condition for your next cooking adventure!


